DIY 8x6 Shed Plans: Perfect for Garden Tools and Equipment
Tired of tripping over garden tools and equipment strewn across your yard? Yearning for a neat, organized space to store your gardening essentials? Building your own 8x6 shed is a surprisingly achievable project that offers significant rewards. This comprehensive guide provides detailed plans and steps to guide you through the process, ensuring you end up with a sturdy and attractive shed perfect for all your gardening needs. Forget expensive pre-fabricated sheds â€" reclaim your space and your weekends with this fulfilling DIY project!
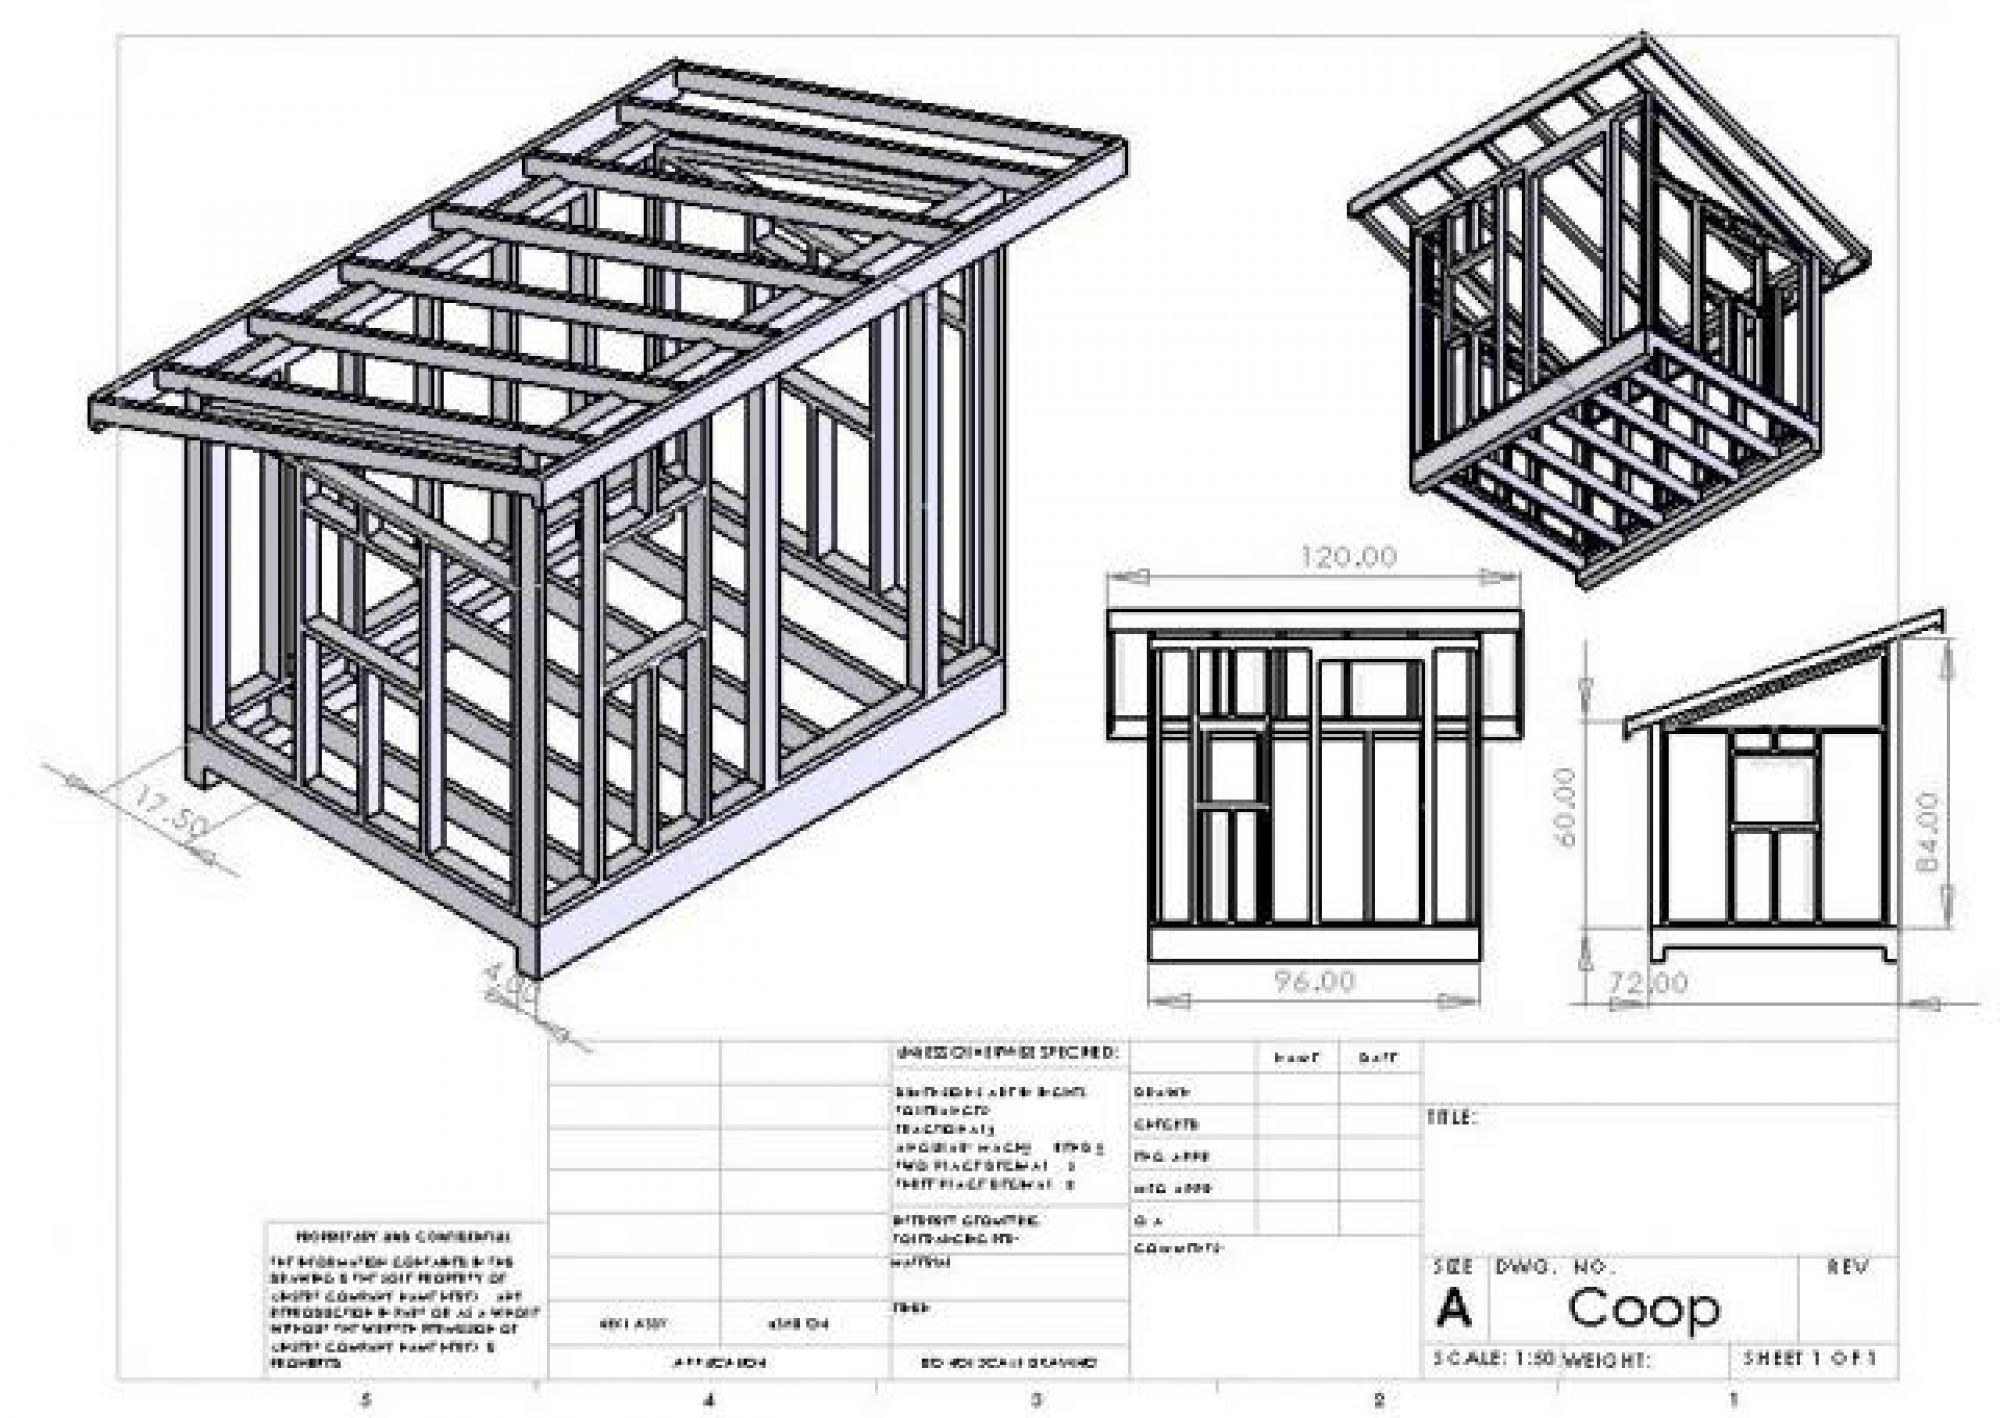
Planning Your 8x6 Shed
Before you grab your hammer, careful planning is crucial. This phase determines the success of your project. First, choose a suitable location. Consider proximity to your garden for easy access, ensuring adequate sunlight for proper ventilation and minimizing potential shadowing on your plants. Check local building codes and regulations regarding shed size and placement. Next, sketch out your shed's design, considering features like a single or double door, window placement for natural light, and shelving arrangements for optimal storage. Remember, accurately measuring and recording dimensions is vital for cutting materials efficiently. Don't underestimate the importance of this planning stage; a well-planned project translates to a smoother build and a more satisfying outcome.
Essential Materials List
Gathering the necessary materials beforehand streamlines the construction process. Your list will vary slightly based on your chosen design, but essentials include: pressure-treated lumber for the frame (4x4 posts, 2x4 studs, 2x6 floor joists), plywood for the walls and roof, roofing felt or shingles, screws and nails, hinges, a door handle, and weatherproofing sealant. Consider purchasing slightly more materials than you estimate to account for potential errors or cuts. Quality materials contribute significantly to the shed's longevity and durability. Don't cut corners here; investing in good materials will save you time and money in the long run.
Constructing the Shed Frame
Building the frame is the foundation of your shed. Begin by laying out the base, accurately measuring and cutting the 4x4 posts to form the corners. Securely fasten these using appropriate screws and metal brackets. Next, attach the 2x4 studs to create the walls, ensuring they are perfectly plumb and square. This requires precision and patience. Carefully measure and cut the 2x6 floor joists, spacing them evenly to provide solid support for your plywood flooring. Finally, construct the roof frame, ensuring a suitable pitch for water runoff. A level is your best friend during this stage; accuracy ensures the stability and longevity of your shed.
Step-by-Step Construction Guide
- Laying the Foundation: Prepare a level base using concrete blocks or a compacted gravel base. This prevents settling and protects the wood from moisture.
- Erecting the Walls: Attach the plywood sheeting to the frame, ensuring secure fastening and proper alignment. Apply weatherproofing sealant around all edges for added protection.
- Installing the Roof: Cover the roof frame with plywood, then apply roofing felt or shingles. Seal all joints to prevent leaks.
- Attaching the Door: Hang the door using hinges, and install the handle securely.
- Adding Finishing Touches: Install any windows, shelves, or additional features you planned. Apply a final coat of weather sealant.
Finishing Touches and Maintenance
Once the structure is complete, add your personal touches. Consider painting or staining the shed to match your garden aesthetic. Installing shelving maximizes storage space and keeps your tools organized. Regular maintenance is key to prolonging the shed's life. This includes inspecting for any damage, resealing gaps or cracks, and cleaning the exterior regularly. With proper care, your DIY 8x6 shed will provide years of reliable storage for your gardening tools and equipment.
Building your own shed is a rewarding experience. It provides a sense of accomplishment and a customized storage solution perfectly tailored to your needs. So, gather your tools, follow these detailed plans, and embark on this fulfilling DIY project! You’ll be amazed at what you can achieve.


No comments:
Post a Comment
Note: Only a member of this blog may post a comment.