Building Your Own 6x8 Shed: A Step-by-Step Guide
So, you're thinking about building your own shed? That's awesome! A 6x8 shed is a great size for a beginner project â€" it's manageable, useful, and incredibly satisfying to complete. This guide will walk you through the process, step-by-step, in a way that even a relative newbie can understand. Grab your coffee, let's get started!
Planning and Preparation: Laying the Groundwork
Before you even think about hammering a nail, you need a solid plan. This isn't about drawing perfect architectural diagrams (unless you're into that!), but rather making sure you've got your ducks in a row. This stage is crucial to avoid headaches later on.
Choosing Your Location
Where will your shed live? Consider proximity to your house (for easy access), access to utilities (if you plan on electricity), sunlight (if you're storing plants or sensitive items), and drainage (you don't want a soggy shed!). Check local building codes and regulations â€" some areas have restrictions on shed placement.
Gathering Your Materials
This is where a good materials list is your best friend. You'll need:
- Pressure-treated lumber for the base (skids or concrete piers)
- Pressure-treated lumber for the floor joists and framing
- Plywood for the floor and walls
- Roofing material (shingles, metal, etc.)
- Exterior siding (optional, but adds a nice finish)
- Nails, screws, and other fasteners
- Post anchors or concrete (for securing the base)
- Level, measuring tape, saw (circular saw and hand saw are recommended), hammer, drill, safety glasses, work gloves
I recommend visiting a home improvement store and talking to one of their associates. They can help you figure out exactly what you'll need and even pre-cut some of the lumber to save you time!
Obtaining Necessary Permits (If Needed)
Check with your local building department. Many areas require permits for sheds over a certain size. It's much better to get this sorted out early to avoid potential fines or demolition orders down the line.
Building the Foundation: A Solid Base
A strong foundation is paramount for a long-lasting shed. You've got a couple of choices here:
Concrete Piers
This is a more permanent and robust option. You'll dig holes, set concrete pier blocks, and then build your floor joists on top. It's more work initially, but offers excellent stability.
Skids (Pressure Treated Lumber)
This is a simpler, quicker method. You create a frame from pressure-treated lumber and place it directly on the ground. It's less expensive, but might not be as durable if you live in a wet climate or on uneven ground. Make sure your ground is level first!
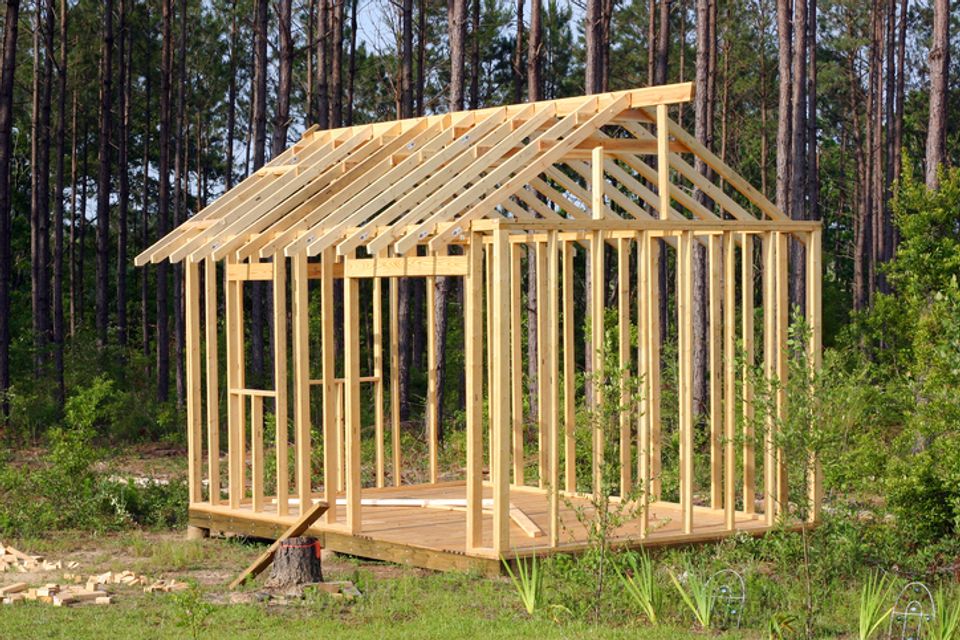
Framing the Walls and Roof: The Structure Takes Shape
Once your foundation is set, it's time to build the walls and roof. This is where having your measurements accurate is important. Remember to always double check measurements before cutting wood!
Wall Framing
Cut and assemble the wall frames using your pressure-treated lumber. Make sure they are square and plumb (perfectly vertical and at right angles). Use appropriate fasteners to secure the joints.
Roof Framing
The roof design depends on your preference â€" gable, shed, or hip roofs are common choices for sheds. Again, accurate cutting and assembly are key. Ensure that the rafters are properly spaced and secured to the wall frames.
Sheathing the Walls and Roof
Once your frame is complete, it's time to add sheathing â€" typically plywood. This provides a solid surface for the siding and roofing materials to attach to. Secure the sheathing with nails, making sure to follow proper spacing guidelines.
Adding the Finishing Touches: Making it Look Great
The structure is up, but it's time to add the final elements that make your shed functional and appealing.
Installing the Siding
This is optional but adds a significant aesthetic upgrade. Choose a siding that suits your style and complements your house or other outdoor structures. This is a good opportunity to add insulation to your shed's walls, if desired.
Roofing
Apply your chosen roofing material. This could be asphalt shingles, metal roofing, or even rubber roofing depending on your budget and preference. Make sure it's properly sealed to prevent leaks.
Door and Window Installation
Install your door and any windows you planned for. Proper sealing and weatherstripping are crucial here to prevent drafts and maintain a comfortable interior temperature.
Final Steps and Tips
You're almost there! Here are a few final steps to ensure your shed is ready for use:
- Clean up the site: Dispose of all debris properly.
- Inspect your work: Check for any loose nails, gaps, or other issues.
- Add finishing touches: Consider adding trim, paint, or other decorative elements.
- Enjoy your new shed!: You've earned it!
Remember, this is a general guide. There might be slight variations depending on your specific design and chosen materials. Always consult detailed building plans and take safety precautions throughout the entire process. Don't hesitate to ask for help from more experienced builders if you need it.
Frequently Asked Questions (FAQs)
Here are some common questions people ask about building their own sheds:
How long does it take to build a 6x8 shed?
This varies greatly depending on your experience and the complexity of your design. A weekend warrior might take a couple of weekends, while someone more experienced might complete it in a long weekend. Allow plenty of time, and don't rush!
How much does it cost to build a 6x8 shed?
The cost varies based on the materials you choose (e.g., basic plywood vs. higher-end siding). Expect to spend anywhere from $500 to $2000+ depending on your selections. This excludes permits and any necessary tools you don't already own.
What tools do I need?
A basic set of tools includes a measuring tape, saw (circular saw and handsaw are helpful), hammer, drill, level, and safety equipment (safety glasses and work gloves).
Can I add electricity to my shed?
Yes, but it's recommended to consult a qualified electrician to ensure it's done safely and according to code. You’ll need to plan for this from the beginning.
What if I make a mistake?
Don’t panic! Mistakes happen. It’s a learning process. Carefully assess the mistake and figure out the best way to correct it. Sometimes, starting over a section is easier than trying to fix it incorrectly.
Building your own shed is a rewarding experience. Take your time, plan carefully, and enjoy the process! With a little patience and effort, you’ll have a beautiful and functional shed in no time.


No comments:
Post a Comment
Note: Only a member of this blog may post a comment.